Circular Skins: From Culinary Waste to Sculptural Light
Follow along to create your own biomaterial.
-
Chapter 1
-
Lesson 1: Gathering Your Tools
We start by walking through the essential kit you’ll need to transform kitchen waste into design-grade material. I’ll explain the specific role of each tool and suggest possible alternatives to help you get started with what you have.
-
Lesson 2: The Ingredients
In this lesson, you will learn the specific ingredients used in the recipe and the precise measurements needed to successfully recreate the mixture. Mastering these ratios is the first step toward achieving consistent results in your own material experiments.
-
-
Chapter 2
-
Lesson 3: Mixing & Preparation
In this lesson, we focus on properly mixing and preparing all ingredients for the biomaterial, ensuring everything is ready before moving into the cooking process.
-
Lesson 4: Cooking
In this lesson, we cover the cooking process and the specific temperature cues needed to activate the biopolymer. You will learn how to monitor the mixture’s consistency and color to ensure the material reaches its peak structural integrity.
-
-
Chapter 3
-
Lesson 5: Casting
This lesson marks the transition from liquid chemistry to tactile creation. Now that your biomaterial is cooked, you will learn the precise art of casting to ensure structural integrity and aesthetic beauty for your lampshade.
-
Lesson 6: The Drying Process
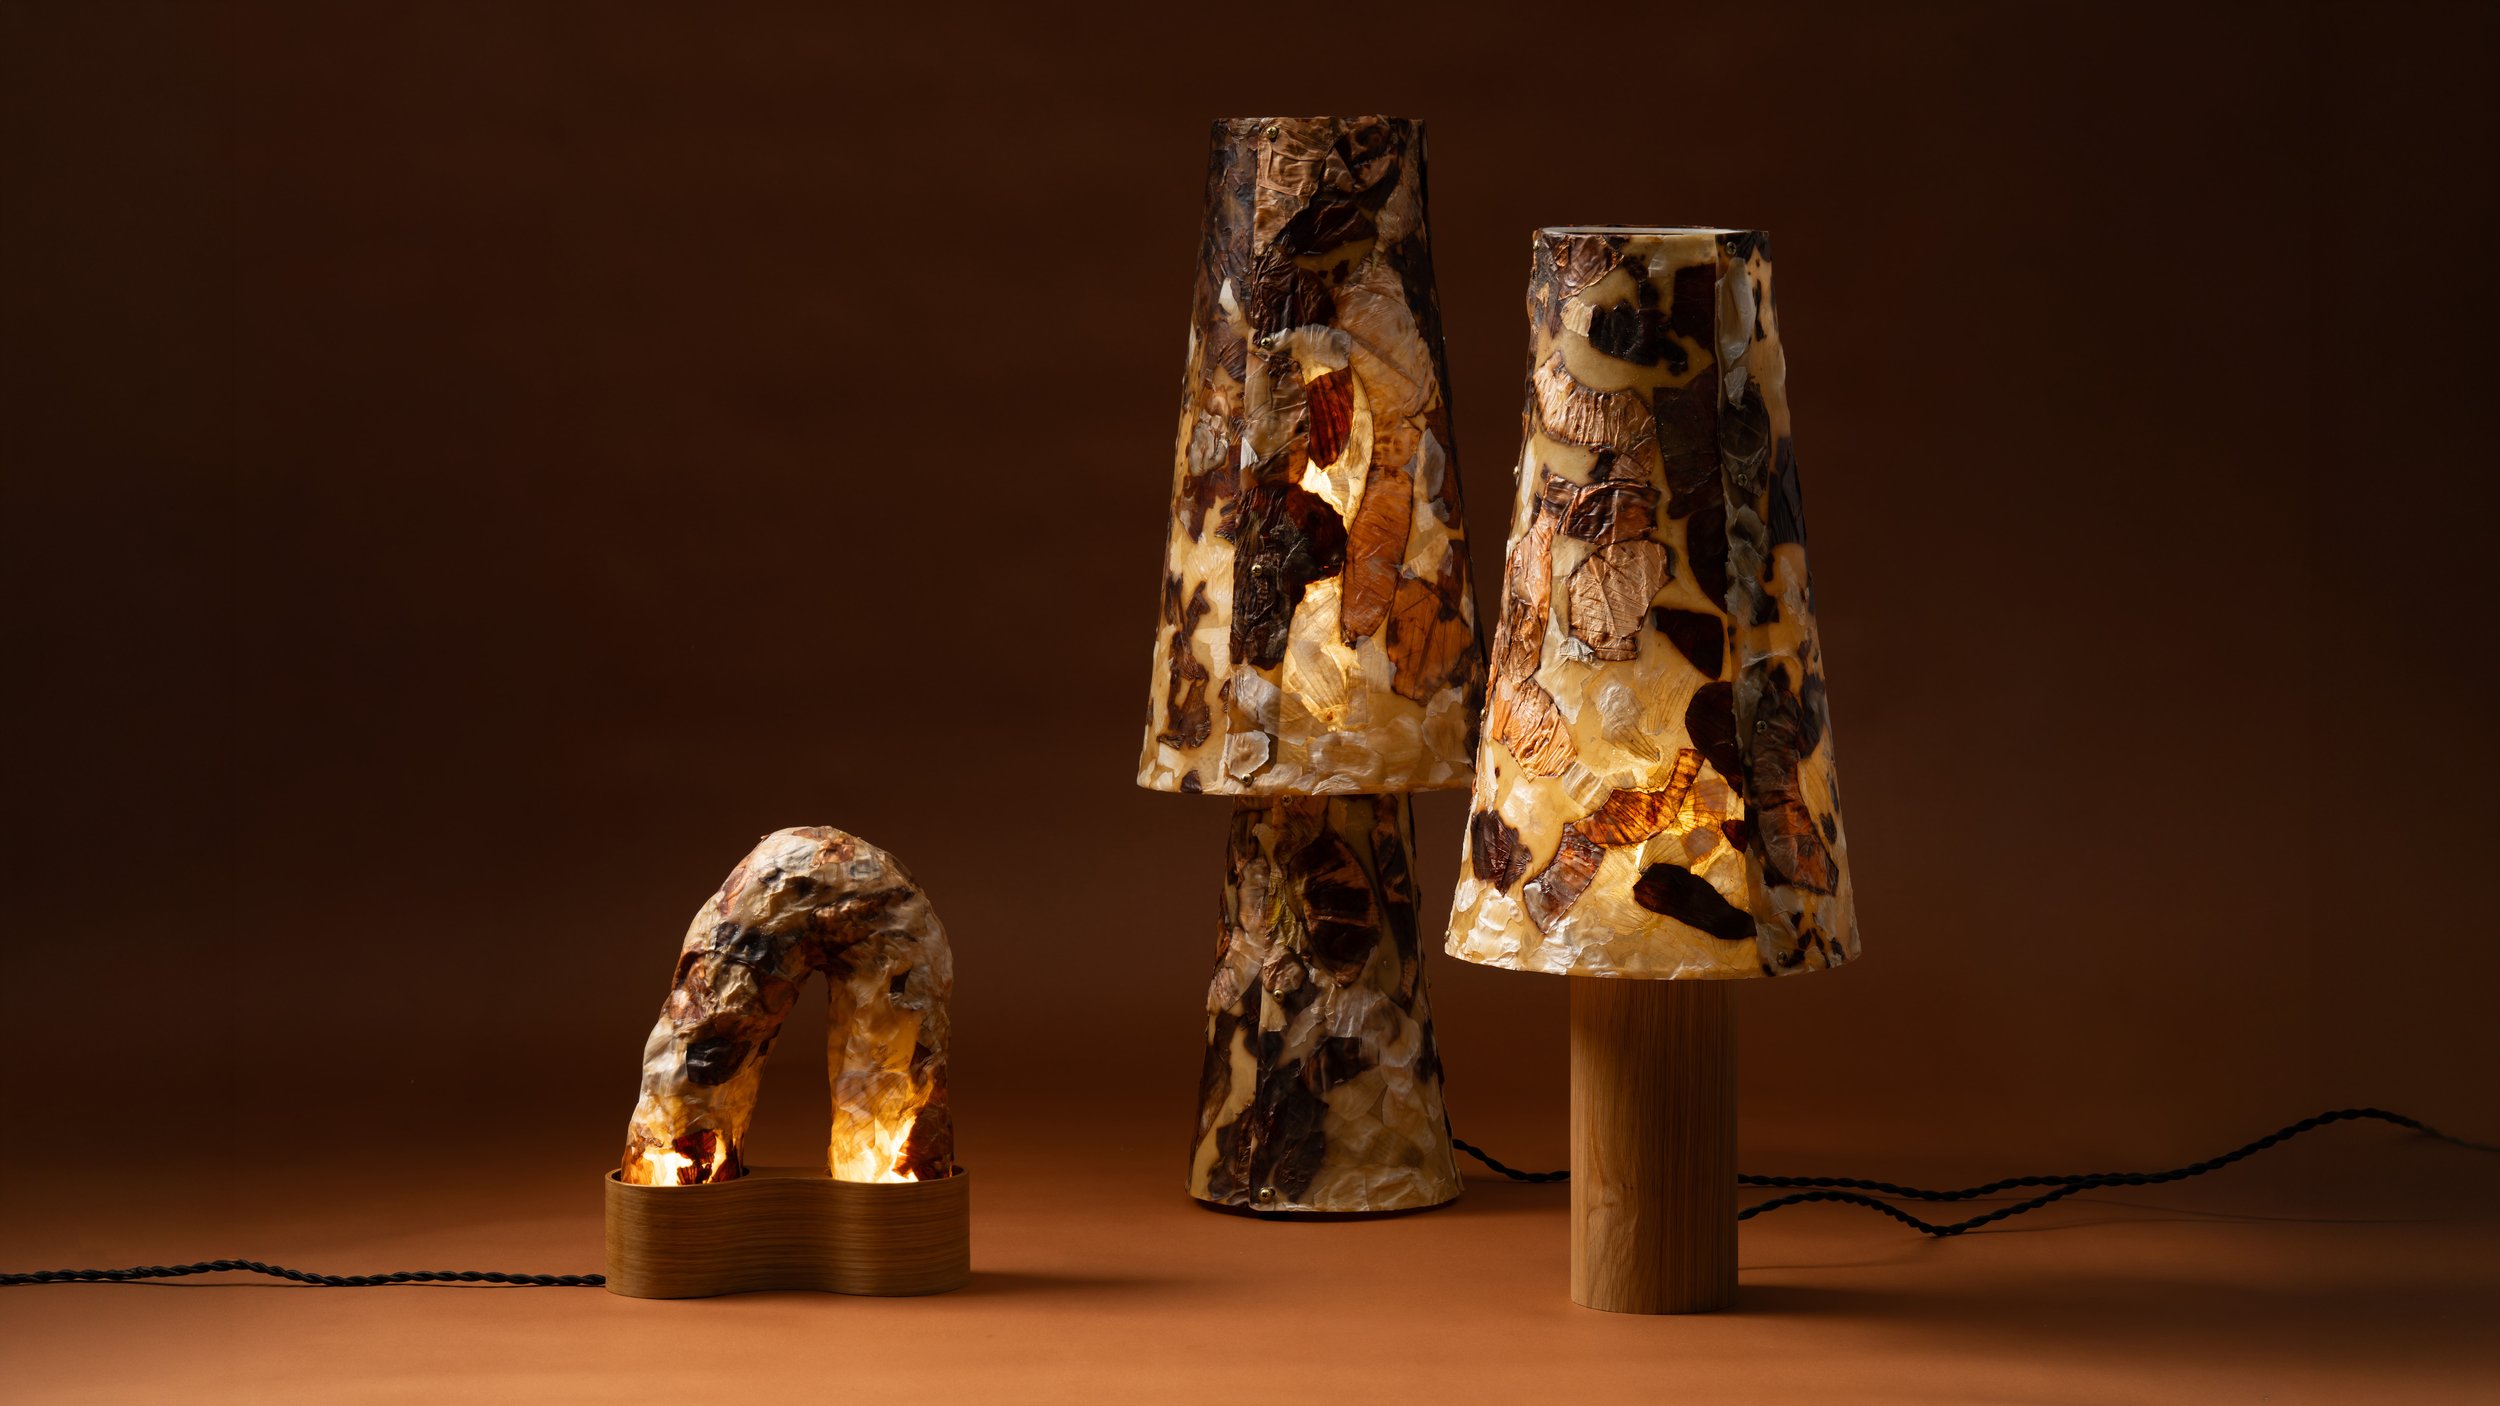
In this lesson, we transition from the active casting phase to the critical period of atmospheric curing. Because our material is a complex biopolymer matrix of gelatin, glycerin, and sorbitol, "drying" is more than just water evaporation—it is the stage where the molecular chains lock into their final, semi-flexible structure.
-
-
Chapter 4
-
Lesson 7: Flip & Form
Discover the critical moment where material becomes architecture. In this lesson, we navigate the delicate process of de-molding the biopolymer and manipulating its final shape. You will learn how to balance structural tension with the material’s natural flexibility, ensuring your prototypes hold their form as they transition into a permanent state.
-
Lesson 8: The Final Reveal
The culmination of the regenerative process. In this final installment, we unveil the completed onion skin prototypes and witness the material’s true character. This lesson explores the interplay between light and organic texture, demonstrating how common food byproducts can be elevated into sculptural forms that bridge the gap between nature and the domestic interior.
-
-
Final Thoughts
What You'll LearnBio-based experimentation
Shift your relationship with materials from consumption to authorship. When you turn something as ordinary as household “trash” into a usable, structured material, you start to see that you are not just using design materials but that you are capable of creating them.
Build Confidence
Gain insight into the personal research and years of trial and error that led to these specific material results. We pull back the curtain on the iterative testing process required to stabilize organic waste into high-performance design. Take an in-depth look at the final recipe we landed on and the science that makes this unique biopolymer possible.
A Look Behind the Scenes
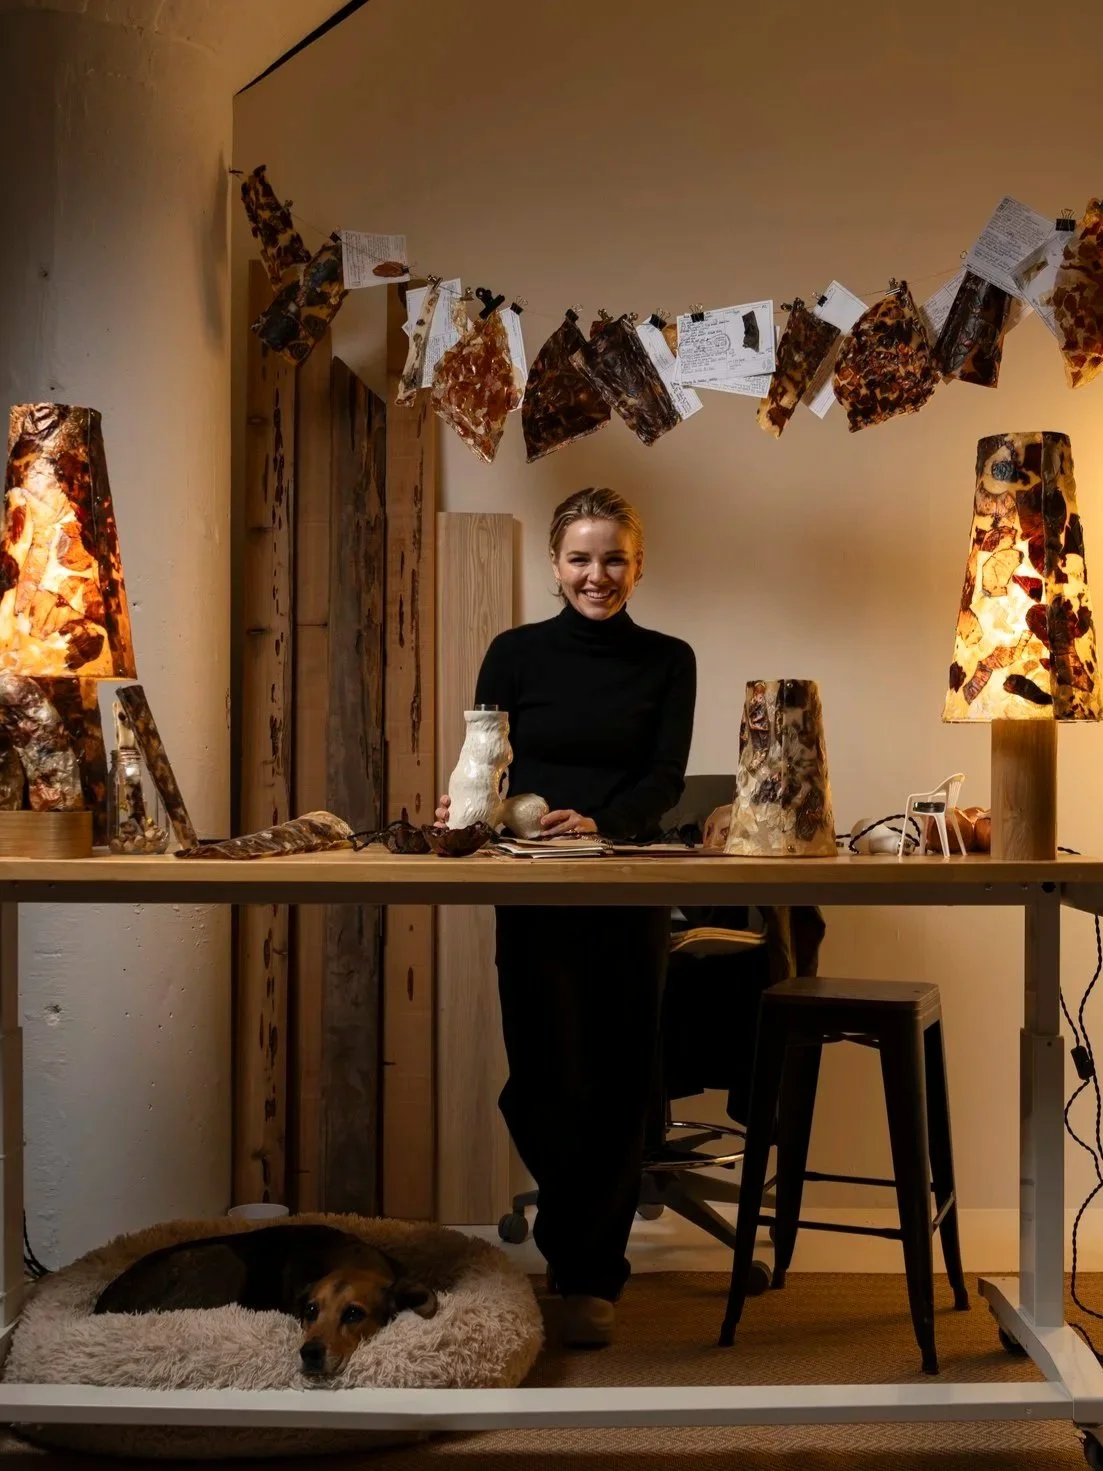
In studio with Professor CoCo Ree Lemery and Dr. Watson
Remove the fear of “preciousness.” Because the material comes from waste and is low-cost, there is less pressure to get it perfect. You can test, fail, remix, and iterate freely. This permission to experiment builds both technical and creative courage.
Learn New Approaches
Designed to turn any kitchen into a high-functioning studio, proving that you don't need an industrial lab to create high-end biomaterials. We focus on using accessible, everyday tools and common food waste to achieve results that rival professional manufacturing.
From Kitchen to Studio